Lead Module Step-by-Step Guide
This explanation details the flow from setup to lead capture and management
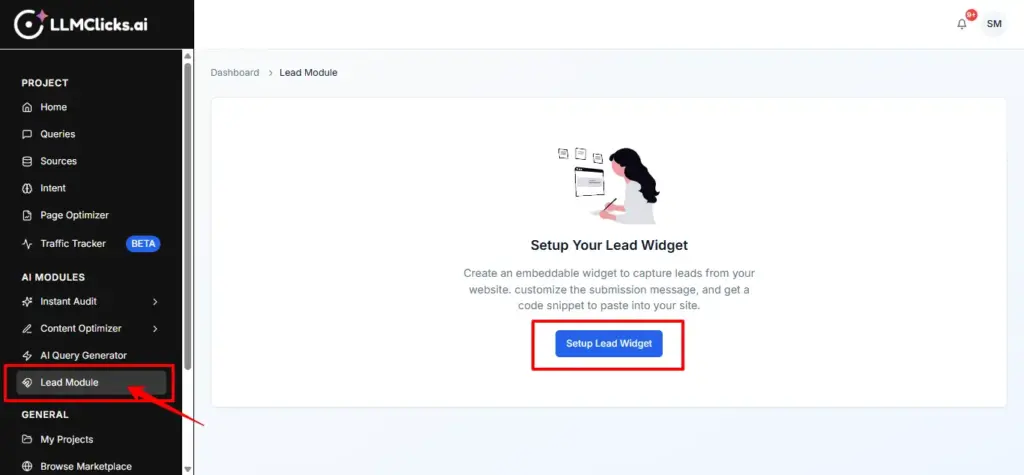
The process begins in the Lead Module section of the dashboard.
Auto-Creation: If you haven’t set up a widget yet, the system (via SetupLeadWidget.tsx) automatically initializes a default floating widget for you.
Widget Types: You can choose between two primary lead capture tools:
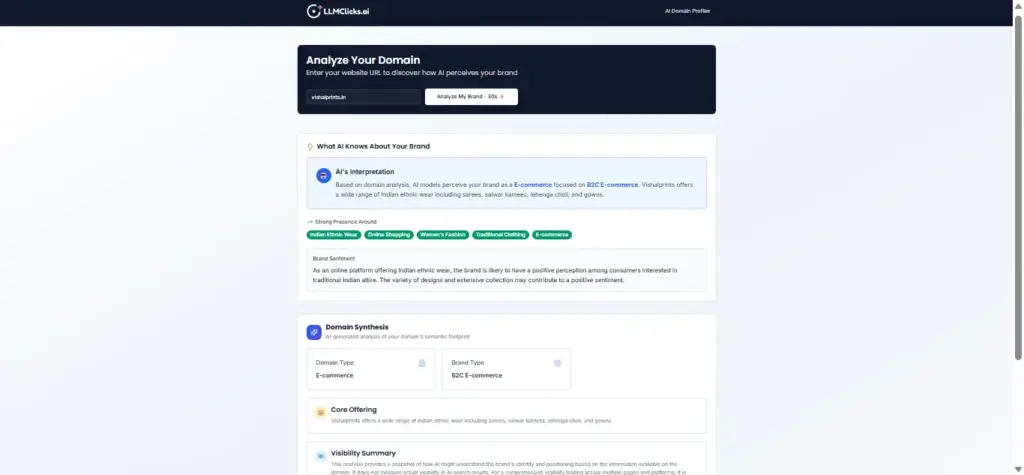
- Domain Profiler: Captures leads by offering visitors a free SEO audit/domain analysis.
- Rank Tracker: Captures leads by offering keyword ranking reports.
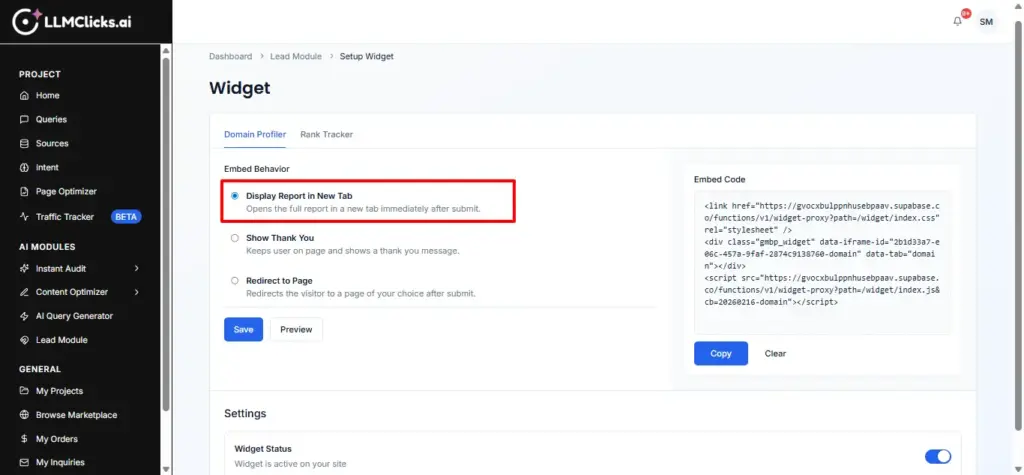
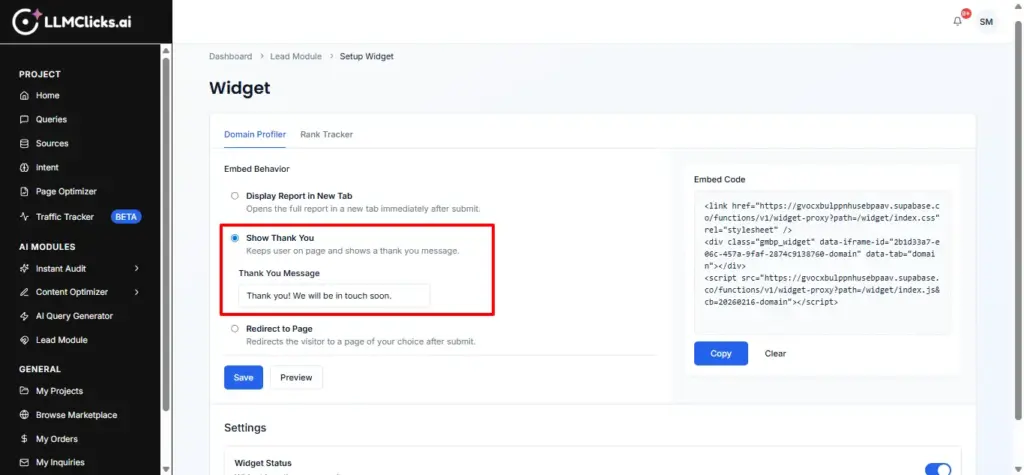
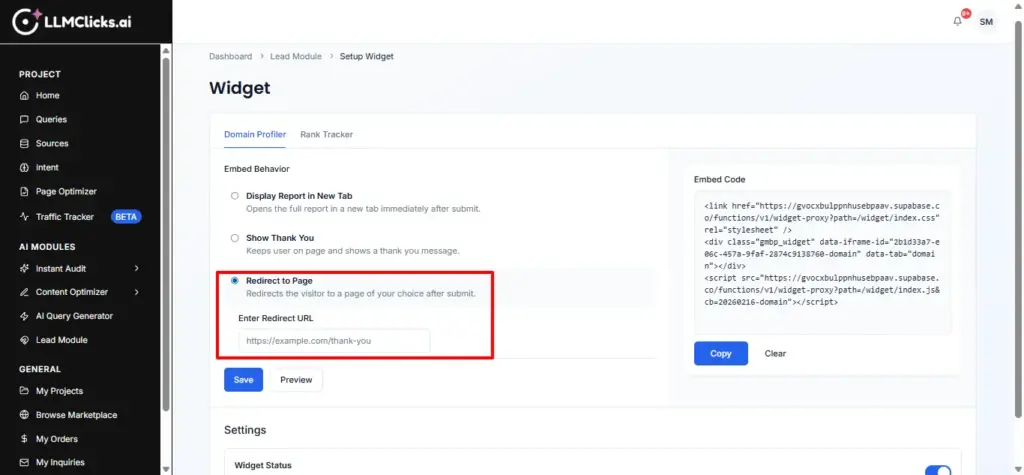
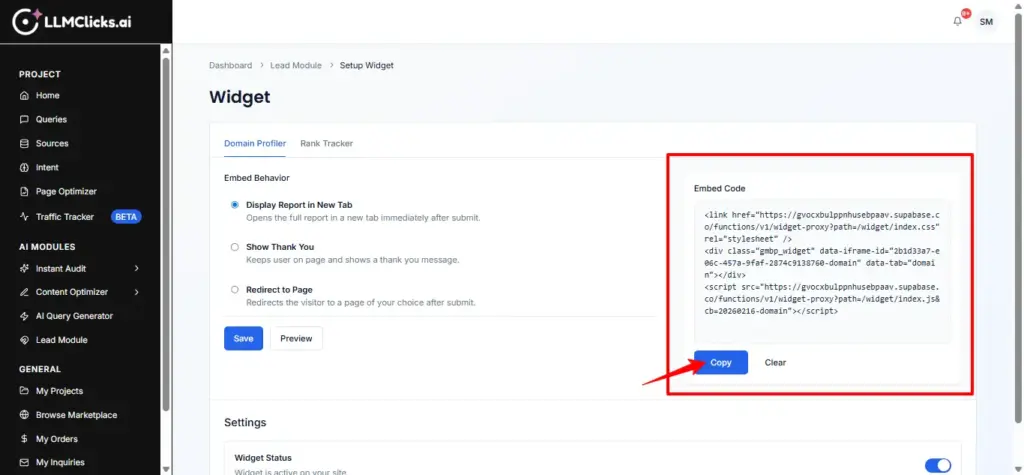
In the Setup Widget page, you define what happens after a visitor submits their information:
Display Report: Automatically opens the generated report in a new tab.
Show Thank You: Keeps the visitor on your page and displays a custom message (e.g., “Thank you! Our team will contact you soon.”).
Redirect: Sends the visitor to a specific URL, such as a Calendly booking link or a specific landing page.
Once configured, the system generates a small Embed Code snippet.
The Code: It consists of a CSS file for styling, a div tag acting as a placeholder, and a Javascript script that loads the interactive widget.
Implementation: You copy this snippet and paste it into the HTML of your website. The widget then appears as a professional tool for your visitors.
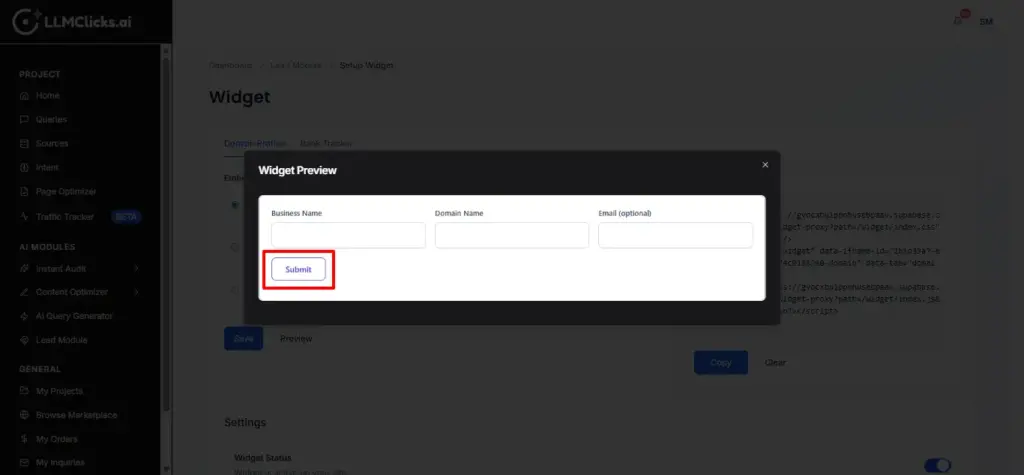
When a visitor uses the widget on your site:
They enter their Business Name, Domain, and Contact Email.
The widget communicates with a Function (submit-domain-profiler or submit-rank-tracker).
This function processes the request, generates the necessary data, and saves the visitor’s details as a new lead in the database.
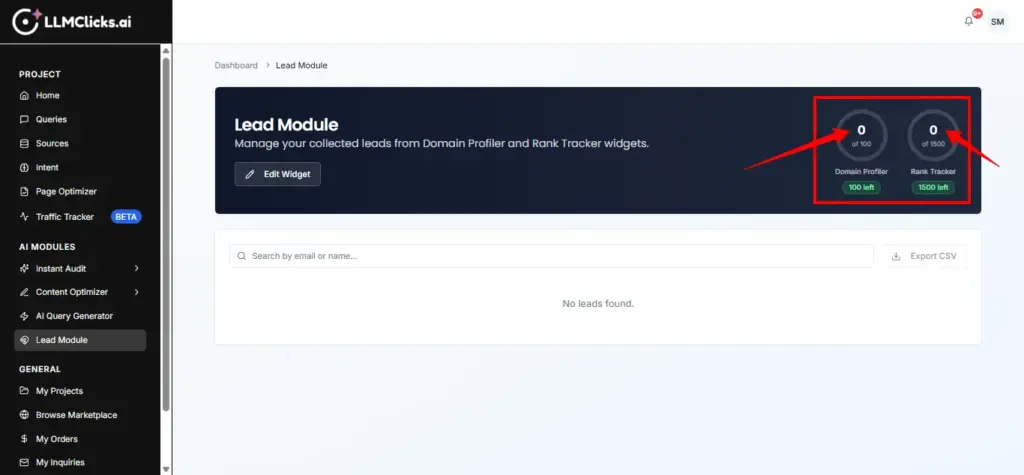
Capturing a lead consumes credits from your account:
Domain Profiler uses “LLM Predictor” report credits.
Rank Tracker uses “Query” credits
The system automatically checks if you have enough credits before allowing a submission and updates your usage gauges in real-time in the Lead Module dashboard.
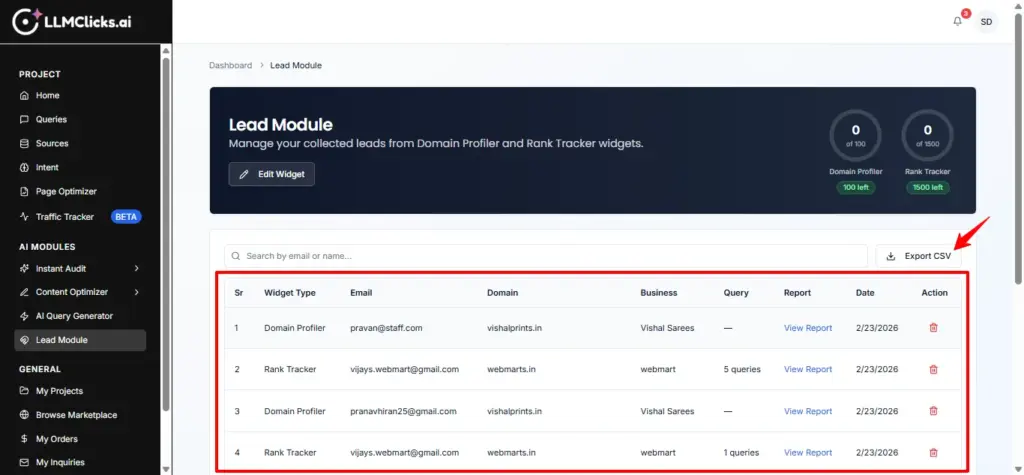
All submissions are centralized in the Lead Module Dashboard
Leads Table: A comprehensive list showing the visitor’s name, email, domain, and exactly which widget/page they converted from.
Review: You can monitor which widgets are performing best and view the data needed to follow up with potential clients.
You can monitor your Credit Gauges at the top of the Lead Module page to see how many more leads you can capture in the current billing cycle. If you run out of credits, you are prompted to upgrade your plan to keep the widgets active.